Happy Monday, friends!
I have been wanting to make this pulley lamp for AGES! I've had the light and pulley for over a year now, but only recently figured out where to place my soon-to-be light; in the darkest corner of the living room. This project is super simple and would really only take an hour or less depending on skill level (I would rate this 2 stars on a scale of 1-5 difficulty) and materials on hand.

I bought this vintage wood pulley from Faded Elegance in Downtown Snohomish last summer. I think it was around $40. They pop up in vintage shops now and again if you're in the mood for a hunt, otherwise you could find them at a local hardware store or building salvage place.
The light I bought from Target. They have a good selection of lighting and I bought this one in particular because the cage is cool AND the cord is wrapped nicely so it can be swagged and not look unsightly.
The rest of the hardware a tools are readily available at your local hardware store.
If your light plug is too large to fit through the opening in the pulley, follow steps 1-3. If your pulley opening is large enough for the plug end to fit through, congratulations! Your hard work is over and you probably don't need to read the rest of this tutorial to figure out where to go from here.
It should be said that whenever dealing with electricity, practice caution. Never plug in a light with exposed wires.
Disclaimer: If you build and/or use this lighting, you assume all liability and responsibility for any injuries or damage that may occur.
Let's get down to it...
Step 1:
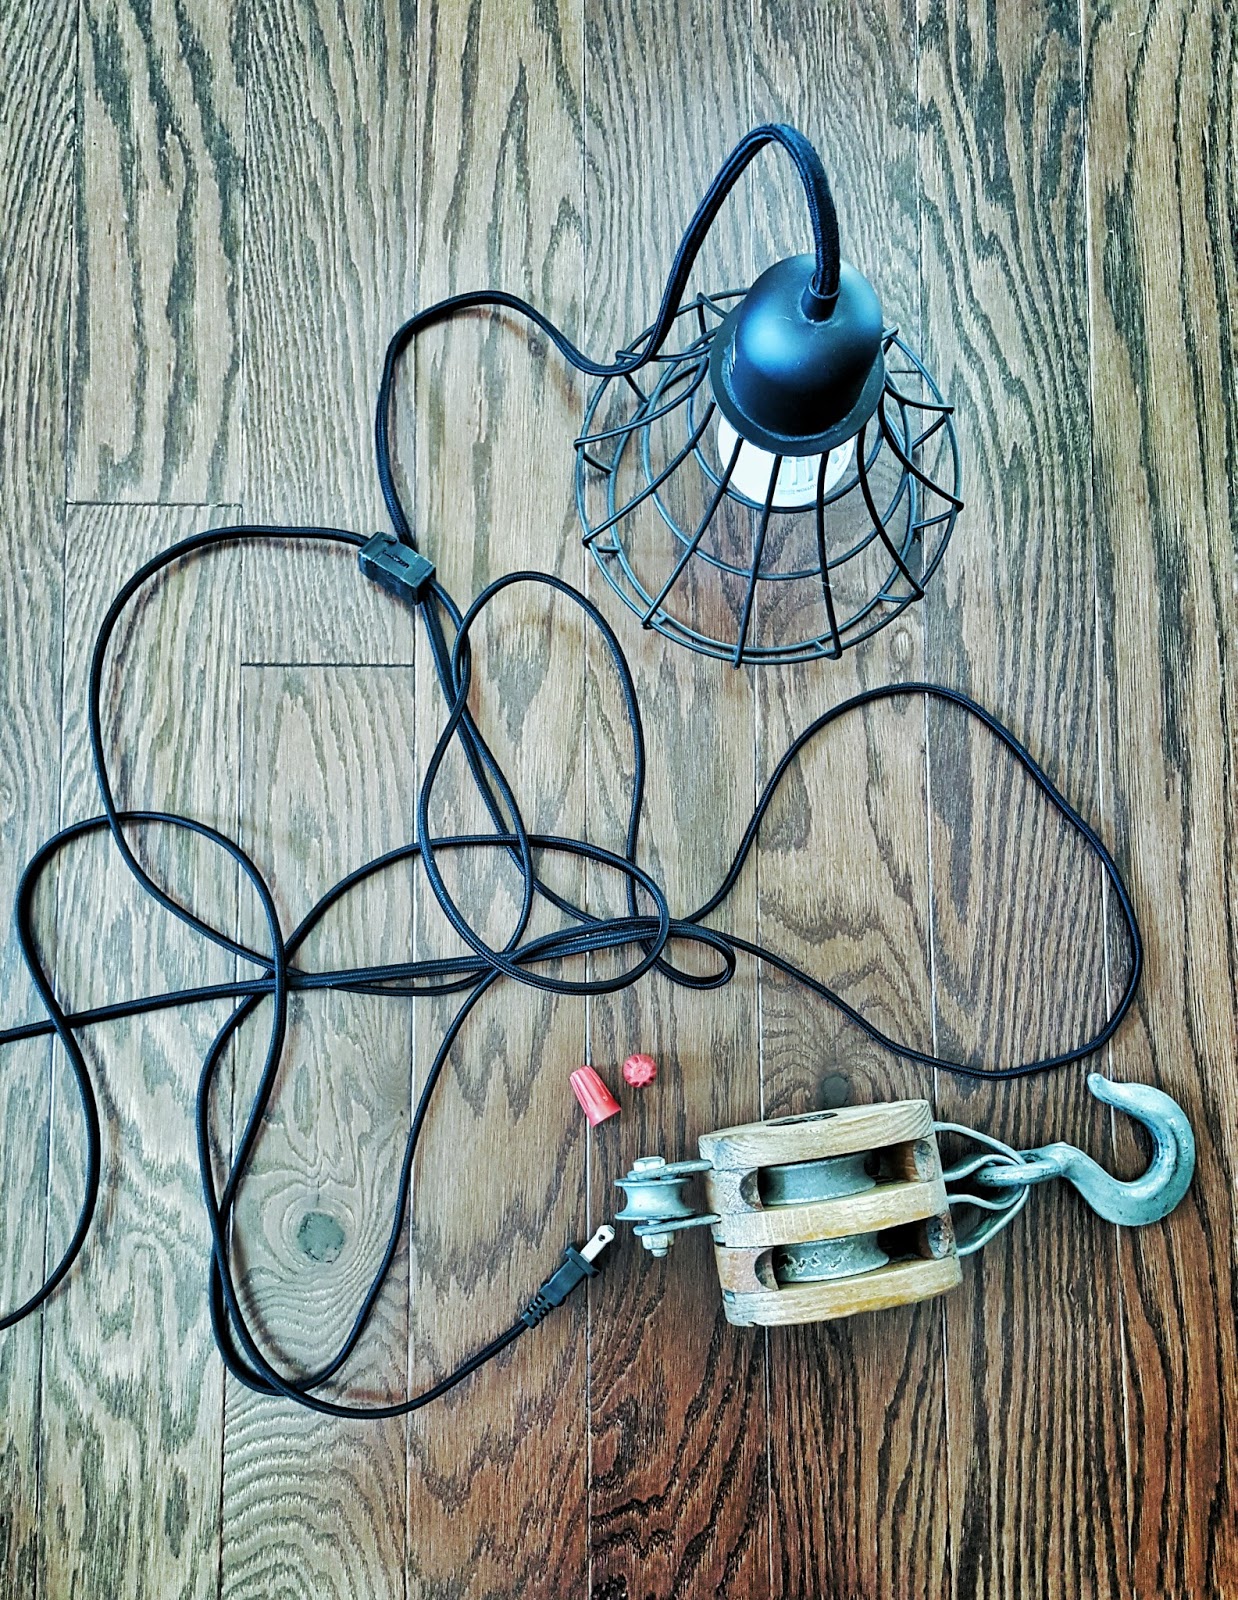
Gather all your supplies. You will need:
- Light
- Pulley
- Electrical Caps
- Electrical Tape
- Scissors or Wire Strippers
- Screwdriver
- Ceiling Hook
- Rope Cleat (I used a 4-1/2" size)
Step 2:
Take scissors and cut the cord about 4 inches above the plug. You will need the length for twisting the stripped wires together.

After you cut the cord, take your scissors or wire strippers and cut away the plastic covering and expose the bundle of copper wires underneath. Make sure not to cut through the copper wire, but if you do, just simply strip further back until you get about an inch of wire exposed.


Strip both sets of wires on each cord. This included the plug end and the end attached to the light. Your wires should look like this when you're finished....


Great! Now....
Step 3:
Take your light cord end and string it through the pulley the way you would like it to hang. If your cord was like mine, you probably had a switch on the cord. This most likely won't fit through the pulley opening either. Soooo.... you have to take the switch apart by taking the housing off. It's not as scary as it sounds.

Unscrew the little screw that runs through the center of the switch. Once you do, it should come apart easily and you'll find the switch mechanism inside.

There might be a little nut on the under side of the switch that holds the actual switch mechanism in place. You have to remove that in order to take off the switch wheel. Once you have done that, you'll find something similar to this under the wheel. Simply remove all the housing around the wires and the cord should now fit through the pulley.

Once you have the switch portion passed through the pulley, you may reattach it by screwing the wheel and housing back together. Just retrace your steps. You don't have to strip any wires for this part.

Step 4:
Alright, now take your two exposed ends like so...

And twist them together to reattach the cord as seen below.

Cool! It's starting to look like your finished product! Just a few more steps...
Step 5:
Take your electrical caps (small sized ones work best as the wire bundle is thin) and twist them righty tighty over the twisted wire pairs. You will notice threading on the inside of the wire caps, this grabs the copper wire and makes the connection complete.

Next you'll need to tape the wires with electrical tape to secure the connection and make sure the wires do not come loose from the electrical caps. I always test my connections before I do all the taping, because it's quite aggravating if it isn't connected completely and I have to rip off all the tape to connect them properly. It is important to not touch the wire or electrical caps when plugging it in or after it's been plugged in. It's safe once the caps are taped up and all exposed wire is covered.

It works!
Now unplug the light and move to the next step.
Step 6:
Wrap each pair of connected wires separately with several layers of electrical tape (I used blue vinyl tape so it would show up better in pictures, black is usually the color you find).

Then once the two are wrapped, wrap the two pairs together for extra strength. After this step you can use more electrical tape to secure any frayed ends if your cord was covered in fabric like mine.

Step 7:
Now that your light is working and pulled through the pulley tackle, it's time to mount it to the ceiling. Now depending on how large your hook is, you'll need to find either an eye hook or a ceiling mounted decorative hook big enough in which to hang your light. I chose the decorative hook that just screws into the drywall and holds 15 lbs. My light isn't 15 lbs, but the hook was the size I needed for my pulley hook. I like the idea of an eye hook because it keeps with the industrial feel, but I ultimately chose the decorative one so I could hang it in the center of the wall instead of in a stud.
Make sure you hold the light in the area you want it to see how far out from the wall you will need to mount your hook so the light isn't pushed against the wall.
Now all that is left to do is use the rope cleat to secure your cord so the light stays where you want it!

A simple twist around the rope cleat is enough to hold the light up. Don't cinch it down tightly as you can pinch wires and your cord will have "forever creases" haha!
Then plug it in, step back, and admire your new DIY light fixture!
Comments
Post a Comment